
서론
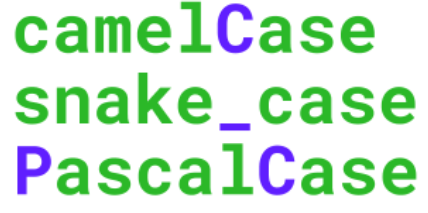
보통 DB 컬럼을 생성할 때 우리는 스네이크케이스를 사용하여 만든다. 예를들어 사용자 이름을 만든다고하면 user_nm 이런식으로 _가 붙여져있는 것을 스네이크케이스라고 한다.
근데 클래스에서 생성하는 변수명은 보통 카멜케이스이다. 예로 userNm 이런식으로 새로운 단어가 합쳐지는 부분을 대문자로 사용하는 것을 카멜케이스라고 한다.
그럼 아래의 예시에서 보면 알겠지만 mybatis에서 쿼리를 돌릴 때의 명과 vo의 명이 다른 것을 알 수 있다. 이때 mybatis 쿼리에서 alias를 사용하여 vo 변수명과 맞춰주어도 되지만 이것은 컬럼 하나씩 다 해줘야 되기때문에 매우 비효율적이다.
그렇다면 이제 간단한 변환방법을 알아보자.
변환 전 상황
1. vo 클래스 (스네이크 케이스로 사용 중)
@Getter
@Setter
public class Notice {
	private String notice_no;
	private String notice_writer;
	private String notice_content;
	private String notice_title;
	private String remark;
}
2. Mapper.xml
<?xml version="1.0" encoding="UTF-8" ?>
<!DOCTYPE mapper PUBLIC "-//mybatis.org//DTD Mapper 3.0//EN"
  "http://mybatis.org/dtd/mybatis-3-mapper.dtd">

<mapper namespace="com.jeongkyun.mapper.NoticeMapper">
	<select id="selectNo" resultType="Notice">
    	SELECT
            notice_no
			notice_writer,
			notice_cont,
			notice_title,
			remark
		FROM tb_notice
		<where>
			<if test=" noticeNo != null and noticeNo != '' ">
				AND notice_no = #{noticeNo}
			</if>
		</where>
	</select>
</mapper>
위와 같이 vo의 변수명을 mapper.xml의 컬럼명에 맞춰서 사용했다. 아래의 방법을 사용하여 스네이크 케이스로 변환해보자
++
이럴 때 위의 서론에서 말했듯 mybatis의 컬럼을 alias를 사용하여 vo의 스네이크 케이스 변수명에 맞춰줘어도 되긴된다. 그렇지만 비효율적이기에 참고로만 알고있자.
변환 방법 (Snake Case -> Camel Case)
1. MybatisConfig.java 파일 설정
@Configuration
@MapperScan(basePackages = {"com.jeongkyun.mapper"}
			,sqlSessionFactoryRef="sqlSessionFactory"
			,sqlSessionTemplateRef="sqlSessionTemplate")
public class MybatisConfig {

	@Bean(name="sqlSessionFactory")
	public SqlSessionFactory sqlSessionFactory(@Qualifier("dataSource") DataSource dataSource) throws Exception {
		SqlSessionFactoryBean sqlSessionFactoryBean = new SqlSessionFactoryBean();
		sqlSessionFactoryBean.setDataSource(dataSource);

		 // mapper.xml 의 resultType 패키지 주소 생략
		sqlSessionFactoryBean.setTypeAliasesPackage("com.jeongkyun.vo");

		// mybatis 설정 파일 세팅
		sqlSessionFactoryBean.setConfigLocation(new PathMatchingResourcePatternResolver().getResource("classpath:mybatis/mybatis-config.xml"));

		// mapper.xml 위치 패키지 주소
		sqlSessionFactoryBean.setMapperLocations(new PathMatchingResourcePatternResolver().getResources("classpath:/mappers/*Mapper.xml"));

		return sqlSessionFactoryBean.getObject();
	}

	@Bean(name="sqlSessionTemplate")
	public SqlSessionTemplate sqlSessionTemplate(@Qualifier("sqlSessionFactory") SqlSessionFactory sqlSessionFactory) {
		return new SqlSessionTemplate(sqlSessionFactory);
	}
}
위는 mybatisConfig.java에서의 설정이다. 위에서 가운데에 위치한 설정 파일 세팅을 해주어 mybatis-config.xml 파일을 만들어준다. 그 후 아래와 같이 세팅해준다.
2. mybatis-config.xml 파일 설정
<?xml version="1.0" encoding="UTF-8"?>
<!DOCTYPE configuration PUBLIC "-//mybatis.org//DTD Config 3.0//EN" "http://mybatis.org/dtd/mybatis-3-config.dtd">

<configuration>
    <settings>

        <!-- 카멜 케이스 VO 매핑 -->
        <setting name="mapUnderscoreToCamelCase" value="true"/>

        <!-- 쿼리 결과 필드가 null인 경우, 누락이 되서 나오지 않게 설정-->
        <setting name="callSettersOnNulls" value="true"/>

        <!-- 쿼리에 보내는 파라미터가 null인 경우, 오류가 발생하는 것 방지 -->
        <setting name="jdbcTypeForNull" value="NULL"/>

    </settings>
</configuration>
위와 같이 필요한 부분을 설정하고 mapUnderscoreToCamelCase이 _를 대문자로 카멜케이스로 자동 변환해주는 역할을 한다.
변환 후
1. vo 클래스 (카멜케이스로 작성)
@Getter
@Setter
public class Notice {

	private String noticeNo; // 공지번호
	private String noticeWriter; // 공지작성자
	private String noticeContent; // 공지내용
	private String noticeTitle; // 공지제목
	private String remark; // 비고
}
2. Mapper.xml
<?xml version="1.0" encoding="UTF-8" ?>
<!DOCTYPE mapper PUBLIC "-//mybatis.org//DTD Mapper 3.0//EN"
  "http://mybatis.org/dtd/mybatis-3-mapper.dtd">

<mapper namespace="com.jeongkyun.mapper.NoticeMapper">
	<select id="selectNo" resultType="Notice">
		SELECT notice_no,
		notice_writer,
		notice_content,
		notice_title,
		remark
		FROM tb_notice
	</select>
</mapper>
Mapper.xml은 건드린 것이 없고 vo클래스를 원래 방식인 카멜케이스로 작성하였고 실행해보면 문제 없이 잘 작동하는것을 확인할 수 있다.
'Programming > Spring' 카테고리의 다른 글
| [Spring Boot] Jackson을 이용하여 Response값 Filtering 방법 (개념/ 예제) (2) | 2022.06.07 |
|---|---|
| [Spring] 의존성 주입(Dependency Injection)이란? (개념/ 예제/ 총 정리) (2) | 2022.05.31 |
| [Spring Boot] @SessionAttridutes, @ModelAttribute란? (0) | 2022.04.09 |
| [Spring Boot] Thymeleaf Caching의 의미와 설정 (템플릿 캐싱) (0) | 2022.04.08 |
| [Spring Boot] @Vaild 유효성 검사 하는 방법 (개념/ 예제) (1) | 2022.04.08 |
댓글